Tuesday, January 25, 2011

"My beautiful BIG world!"

The other day, for some creative indoor playtime I brainstormed with my nearly 2 year old what to play with.
It was way too hot outside  and the kids were in need of some down time.
After much consideration and a biscuit she declared that she wanted to play with horsies (horses).
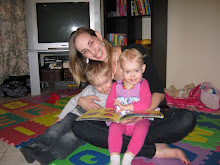
My brother had given her a set of little plastic horses last year so out they came, we found bits and pieces from around the house to make them a nice home as shown in the photo above.

* blue felt sheet for the ocean
*yellow felt sheet for the sand
*green felt sheet for the grass
*3 very different shells for the sand (spiky, smooth and pointy, white, speckled and brown)
out of our bathroom.
*a small blue container lid for the horses drinking water
*some light brown wool for a hay bale
*2 wooden trays that I picked up from an opp shop last year that make great animal pens
(at 80c and 50c)
*horse set (12 horses, a tree, stables and the horse head lid of the horse container that soon became a horse land rock :P


 Both Declan and Thalia became very involved as the scene was created and both had a say in where things ought to go.

It wasn't long before Declan picked up a shell and asked "Mummy, can I hear the beach in this shell?"...too cute

It soon became a shell listening experience and remembering things about when we went to the beach and what it was like.

After the horses had a tour of the beach, the hay bale was shared around so all the horses had some lunch and each horse had their turn at the drinking water....some of the horses started falling down with all the little hands moving in their land.
Declan decided that "they must be tired Mummy, they need to sleep!".


Some horses got moved to the stables, some in the pens and some said they didn't need a nap at all.

Declan's latest prized possession, a plastic crocodile from Dream world that he named crunch and now sleeps with...soon made his way into the nice cool water.
Declan informed the horses that he was a friendly crocodile and would be nice.

Soon declan started thinking more about the beach and quickly went to the toy box to get some more creatures.
Out came the "deep  sea creatures". Sharks, whales, a crab, seals and land creatures too. Chickens, a goose, sheep, donkeys, a duck, a dog and so on.

We were soon singing Old McDonald's farm taking turns naming the animals in play. Thalia lost interest and went to draw with Daddy but Declan was amazed at this little world.


During play and animals chatting to each other, Declan proudly declared this world "my Big beautiful world!"
It was a great experience for all involved and well worth the little effort of finding a few odd and ends to start the kids imagination go wild! They soon completed their own beautiful world, learning all sorts of things in the process.....the process not the product was where the magic was.

Below is a photo of Declan proudly lying down next to his "beautiful BIG world" :D


I recently found a face book page that creates and sells imaginative play sets that inspire play and promote children's natural sense of wonder...using mostly recycled, re purposed and homemade.
If your interested check them out at Homemade rainbows

Sunday, January 23, 2011

"PERFECTLY CHOCOLATE" Chocolate Cake

 For part of the school holidays we had my niece and nephew stay with us from nsw.
Amongst the drama of the floods (our house was not affected),Mum and I trying to update various Tuckie sites with flood and road information, trying to entertain two toddlers and two teenagers... I had a birthday cake to make.

My nephew was turning 15 and what better cake to make than a yummy Chocolate cake that isn't only quick and easy to make but it's also safe for my kids! not to mention it's one of the best chocolate cake recipes I've seen and eaten.


Thanks to a friend who passed on the recipe found here at HERSHEY'S PERFECTLY CHOCOLATE" Chocolate cake

To make it allergy friendly you just need to twig a few ingredient's depending what allergies your catering for.

  • Egg free: Simply use an egg re placer such as 'orgran no egg" instead of egg
  • Nut free: Use Nestle's baking Co coa
  • Dairy free: Use dairy alternative such as rice milk or 'darifree' from allergy friendly foods and use nuttlex instead of butter for the frosting.
I'm not sure how it would turn out with gluten free cake but it's worth a try, let me know if you have a go.

We all enjoyed this chocolate cake to the max, the texture of a gorgeous mud cake and the taste to match.
Share the love and get baking! :)

Here is a pic of my nephew and his cake,
it's not the most attractive attempt but it tasted like heaven.

Wednesday, January 19, 2011

Vintage doll cot bargin :)

Just before Christmas, I strolled through a local opp shop looking for any interesting things and was thrilled when I came across this beautiful old style wooden doll cot for all of $6!!!!

I love that my little girl will now be able to enjoy the experience of having her very own vintage doll cot for play, something you just don't see in the shops these days.

It's solid wood and obviously built by someone rather than being mass produced. When gently pushed it rocks to lull the doll to sleep :D
No batteries or plastic included :P SOLD!!

My little girl has not seen the cot just yet as I need to sand it back,give it a repaint to clean it up and give it a little face lift.
Seeing as her birthday is at the beginning of feb and she will be given a gorgeous new doll from a relative, it's the perfect timing to get it ready for the big reveal.

I can't wait to see the expression on her little pixie face when she sees this lovely treasure.

Tuna and Pasta mornay

Tuna and Pasta Mornay
(Nut free, egg free)

Before we started on the elimination diet I used to make a mean Tuna mornay that was so easy to make and became a fave for my little munchkins.
I have finally come up with a tuna mornay recipe that everyone in our little family is happy with, that suits the munchkins new diet. It's so quick and easy and freezes well too!!

Preparation time:10 min
Total cooking time: 10-15 min
Serves 4
Storage time: Sauce can be made a day ahead. Store, covered, in refrigerator. Cook pasta and reheat sauce just before serving.
Variations: Use Salmon instead of tuna (fresh or canned),
you could also add heated  corn kernels to the mix for a bit of a change.

  • 400g of your choice of pasta (I use organic pasta)
  • 30g butter ( I used nuttlex)
  • 6 shallots, chopped
  • 2 cloves of garlic, crushed
  • 1 tablespoon of plain flour
  • 1 cup milk
  • 1 cup sour cream
  • 1 tablespoon Lemon juice (I make citric lemon juice: dissolve 1 tsp sugar in 4 tbsp warm water.Then add 3/4 tsp citric acid. Remember to only use 1 tbsp for the recipe! the rest can be refrigerated for later use)
  • 425g can of tuna in brine, drained, flaked.
  • 1/2 cup of chopped parsley
  • salt to taste
  1. Add pasta to a large pan of rapidly boiling water to cook until tender.(when tender, drain)
  2. While pasta is cooking, melt butter in a medium pan; add shallots and garlic. Stir over a low heat for 3 min or until tender. Add flour and stir for 1 min.
  3. Combine milk, sour cream and lemon juice in a jug. Add gradually to shallot mixture, stirring constantly. Stir over a medium heat for 3 min or until mixture boils and thickens.
  4. Add tuna and parsley to pan; stir through for 1 min or until heated through. Turn hotplate off.
  5. Add drained pasta to pan, stir until well combined. Season with salt before serving.

Tuesday, January 4, 2011

A Fairy Painting for my little Fairy :)

Thalia checking out what mummy painted up for her room! :D
 Back in May of last year I blogged about a project I was scheming for my little girl.
Click here if you want to read the post for some background.

I am very pleased to say that the first of three fairy painting's is finished!!!!!!
I didn't think it would take me this long at all... but when you factor in child wrangling, tafe study, volunteer work, allergy cooking, time for Daddy, me being a perfectionist and simply time...then the time frame seems a little more realistic and acceptable :P

Thalia loves her painting and is quite happy to have it hanging in her room very soon.

I have vague idea's for the next two paintings so I guess time will tell how they go and when they will be finished.

In the close up photo to the left you can't see the writing on the green book, as the camera didn't pick it up due to the paint glaze over the top.
The writing says 'Thalia - A Fairies Tale'

Thalia's little world is changing so much at the moment, we are currently making the normal party preparations for her 2nd birthday next month, her big bed arrives next month, undies have been brought and will be introduced soon....all after a busy Christmas, New years and Festive season!
Oh and not to mention 7 new bubba friends due to be born in the next 2 months.....excitement plus :D


* My Little Fairy *
photo taken May 2010

Thursday, December 23, 2010

Snowball cookies

I was recently inspired by The Nut free-Mom blog to make these cookies.
Jenny created these cookies from her grandmother's recipe that used a large portion of ground pecans.

Her Daughter has anaphylaxis to nuts like my Declan, so after searching through cookbooks she found a similar cookie- a Greek cookie called Kourambiethes.

Unlike most Greek cookies these contain NO nuts at all. Plus, they have the same shape, taste, delicious flavor and yummy powdered sugar coating that Jenny's grandmother's cookies had.
Here is Jenny's recipe below:
(note: I halved the recipe and it still made 20-30 cookies!)

Snowballs

1 lb (4 sticks) unsalted butter, softened
 *1lb=approx 450g and we used nuttlex to make dairy free
1/4 cup confectioners' sugar + 2 tbsp, plus lots more for sprinkling on cookies
*confectioners sugar= icing sugar
1 egg yolk
*we used oragan's no egg
2 teaspoons pure vanilla extract
* natural vanilla essence, an extract of organic vanilla beans
1/4 tsp pure orange extract (optional)
*we didn't put this in
1 scant tsp salt
5-6 cups of all-purpose flour
*all-purpose flour = self raising flour

Preheat oven to 350 degrees (180 degrees for us in Oz land). Using a standing mixer, beat softened butter until very light and fluffy. Add powdered sugar, egg yolk, vanilla and orange extract if using, beating thoroughly after each addition. Add flour a little at a time until soft dough is formed that can be handled easily. Taking about a teaspoonful at a time, (I use a tiny ice-cream scoop) roll into a small ball. Place on a non-stick cookie sheet and bake for 15-20 minutes. Sprinkle liberally with powdered sugar while still hot. Once cool, sprinkle with plenty of powdered sugar again. Literally, they should look like snowballs!

keep in mind that the dough for these is not super-sweet--kind of like a shortbread cookie.
The sweetness comes from rolling these in powdered sugar when they're hot and then sifting more over them when they are cool.


Head on over and click to visit The Nut-Free Mom  :D

Wednesday, December 22, 2010

Reindeer Christmas tradition- magic reindeer food & reindeer cookies :)

 Now the munchkins are getting a little older, understanding Christmas and it's excitement more it's time to start our own Christmas family traditions...yay!

Reindeer's are fascinating creatures...my kids love them as I do so what better than a Reindeer themed tradition to start us off :)

This tradition will include a craft activity, secret baking (mummy only) and lots of excitement and happiness for all.


On a day in the week prior to Christmas day the munchkins will be involved in making Magic Reindeer food, which they will then sprinkle on our house lawn on Christmas eve to guide the reindeer's to our house. We will also be leaving a milk and cookies out for Santa, but you can't feed Santa and not the reindeer's can you...now that would be rude! :P

Secretly (when the munchkins are sleeping in the week prior to Christmas) I will bake Reindeer face cookies. On Christmas day the munchkins will discover that in return for their kind gesture of magic reindeer food, the reindeer's left us some reindeer's cookies baked by Mrs Claus! .....now that's special :D

This Christmas is the first year for this tradition- the magic reindeer food is made, the cookies baked and the excitement is building.

If you want to join in on this simple yet fun activity see pics and details below :)
Keep in mind that Magic reindeer food is also a great gift for school friends, kindy friends, playmates or grandchildren.

 MAGIC REINDEER FOOD

What you need:
*oats
 (magic oats)
*fine gold glitter
(magic star dust)
*fine red glitter
(red magic berry dust)
*fine green glitter
(magic moss from the mystical forest)
*multi coloured chunky glitter stars
(magic enchanted forest bloom seeds)
*container, glass jar or small glad snap bag
*fabric to place on top of jar lid (optional)
*Reindeer poem tag
Click on these links to print out a pre-made reindeer poem tag
Colour Reindeer poem tag
Black and White Reindeer poem tag


Reindeer Poem to go with:


Sprinkle on the lawn at night
The moon will make it sparkle bright
As Santa's reindeer fly and roam
This will guide them to your home.


Help child(ren) to place all ingredients in small bowl and mix.
Once it's all mixed up and looking pretty put into container, jar or snap lock bag. Attach Reindeer poem tag and it's all ready to sprinkle out on Christmas eve.
Here is our Magic Reindeer food all bagged up and ready to go.


 MRS CLAUS' REINDEER COOKIE RECIPE

 Dairy free, egg free and nut free! (Mrs Claus know all you allergy needs) :D

*125g butter (or nuttlex for those who can't have dairy)
*1/3 cup caster sugar
*approx 1/4 cup golden syrup
*1 3/4 cup sifted self raising flour
* Pretzels
*sweet william choc chips
*raspberry flavour artisse organic lolly pops or cachous (silver cake decorating balls)

1. Beat butter and sugar to a cream and set oven to 180 degrees
2. Add golden syrup and beat well.
3. Slowly add sifted self raising flour.
4. Roll out dough on a lightly floured surface to approx 1cm thick and cut out circles using a cookie cutter or glass (we used a 2 1/2 '' diameter cookie cutter)

 5. Using thumb and forefinger, pinch opposite sides of each slice about two-thirds of the way down to shape face.
Don't be too shy about pinching the sugar cookie dough to form the muzzle, as it will spread out while baking.
6. Break curved sides away from center of each pretzel twist to form antlers. Press bottom of 1 set of antlers on each side at top of each reindeer face.
7. Place two choc chip eyes on each cookie (you could also use sultana's if you like)
8. Smash up a lolly pop into smaller pieces and press into dough for a nose or use a chahous. (you could also use m&m's or a glazed cherry if allowed).
9. Place in oven for approx 10-15 min, time will vary in different ovens.
10. once cookies have cooled place them in a sealed container and hide until the big reveal on Christmas day!
enjoy :)


I would love to hear what Christmas traditions your family has, please leave a comment.
 
Copyright 2009 Sublime Shambles of a Shell. Powered by Blogger
Blogger Templates created by Deluxe Templates
Wordpress by Wpthemesfree