Friday, August 19, 2011

Making a Scarecrow

After a morning helping Poppy in the veggie garden, a very serious conversation arose at the lunch table, between my 4 year old and 2 1/2 yr old.

After a long conversation about what makes the plants grow, the veggie garden, the birds and dirt girl world (a much loved telly program) ,it was decided that Poppy needed a scarecrow to look after his garden to scare away the silly birds.

Living on a house on the same property as Poppy, we often hear the yells, shouts and curses directed towards the local magpies and crows from dear old Poppy.
Poppy often runs out of the house (sometimes wearing only a dressing gown!) like a bolt of lightning to save a baby corn cob or tell a crow off after pecking at a lovely specimen of fruit.

I guess the kids in one way or another the munchkins have realised that Poppy doesn't like the silly birds much and needs a way to get them away.

Not long after Mr 4's Birthday Party we found a nice day to carry out our scarecrow plan.

On reminding the munchkins of their scarecrow idea, they instantly got excited and told me that they had to make a scarecrow just like Hay man (scarecrow from the Dirt Girl world tv series).
 Declan even ran to the play kitchen and said "Mum, he will need some bangers! just like these (holding up two small saucepan lids) he can bang them like Hayman does to scare the birds"

You can see character hayman on the left of this picture :)

First it was off to the second hand store to find some scarecrowish clothes, on finding blue pants, a stripy scarf, cowboy like hat and a check shirt we made our way home. The munchkins had the most input in what was brought.

On arriving home the first task was to find Poppy, ask him where in the garden would be a good spot for our scarecrow and then ask for some help in making Hayman because Mummy really had no idea
Poppy is really good and making stuff.
choosing a good spot!
Then we got to laying out the body parts.
A broom head, pipes for legs, various wood lying around
all secured with good old zip ties.
time for the stuffing to begin
Time to dig some holes and stand him up :)
In the end Poppy and the munchkins all had a good time
(I'm not sure who enjoyed it more!) and all three had a big lunch and a nap :P
Here are the happy bunch with our new scarecrow Hayman!

Just quietly although this was a great project, I don't think our Hayman
is doing his job properly...
Mummy might have seen a crow pinch some corn while Poppy was out the other day.
Perhaps we should have given him eyes!! LOL
shhhh don't tell Poppy.

Mummy still isn't used to Hayman yet, getting the groceries out of her car on a Thursday night has become quite scary when you think you saw a man creeping up against your fence!
Never the less I'm sure Hayman will find his place in the backyard and the kids do check on him most mornings. Quite cute really :D


Thursday, August 18, 2011

Squiggly Wiggly Potato

There white, they are edible, most people have them in some form in their dinner and they have the potential to make all sorts of textures.......Potatoes!!!

I was getting sick of the same old mash, chips, potato bake, baked potatoes and so I went on the search for a new recipe for a potato side to go with dinner.
That's when I found a recipe for Crispy Potato rosti.
After a quick look, I realised yes it's safe, looks good so Wednesday this week we had a try and the potatoes were enjoyed by all, definitely a do again recipe!!!

They made the perfect side to our steak and steamed veggies.
After painting a squiggly wiggly monster Wednesday morning, Declan decided that the rosti's will now be known as Squiggly wiggly potatoes! :P

Without any further ado, here is the recipe if you would like to make some too.

Crispy Potato Rosti Squiggly Wiggly Potato :P

makes:8
preparation time: 10 min
cooking: 12 min

700g potatoes, peeled and grated
1 egg (we obviously used 'no egg' powder due to allergies)
2 tbsp chopped chives
2 tbsp plain flour
1/2 tsp baking powder
vegetable oil, to shallow fry (we used canoila oil)

  • Squeeze handfuls of grated potato over  bowl to remove as much liquid as you can. Place the squeezed potato in a clean bowl.
  • Add egg and chives, and sift over flour and baking powder. Mix until combined. Season with salt and pepper
  • Heat about 4 x 1/4cupfuls of mixture into the pan and flatten slightly, to about 8cm. Cook over a medium heat for about 3 mins each side, or until golden brown and crisp. Repeat with remaining mixture. Drain on paper towel.
Enjoy!!!

The racing car party for my Little man


Last month my little man turned the BIG 4! It was no surprise that he had chosen a racing car themed party this year and with much excitement helped me organise his party.
We had a few weeks of sickness leading up to his party but we got there in the end and Declan was rather chuffed with the results.

Here are few things that we made leading up to the party, getting the kids excited and involved in the party planning....
Traffic lights collage craft, good decoration for a car party
but a great opportunity to teach the munchkins about road signs and safety.

Race car track collage
The birthday boy really wanted to make his own race track art so with a large piece of blue cardboard (his fave colour) we went to work with black paint, scissors and glue.
He picked racing cars and monster trucks from wrapping paper for us to cut out and picked people to watch the race from magazines.
For some odd reason he had to have all girls and women watching, go figure.
Then to top it off dirt, leaves and wood chips from the garden were collected to make extra details.

Racing car and Construction vehicle mobiles to hang at the party.
These racing car project can be found HERE and the Construction vehicle mobile HERE
both from DLTK's Crafts for Kids.


This next project is not racing car themed but both the munchkins got so excited when they saw it as we were searching for crafts that we did it anyway :)
I guess the party moved on to be a transportation theme in the end...lol

We found this craft HERE and turned it into a collage for the wall.
Again this proved to be a good opportunity to talk about fire safety and how fire fighters help people as we crafted away.
The birthday boy came up with idea's such as bubble wrap for the water coming from the fire hose and Cotton balls for smoke.

Then due to Mummy loving buntings and now able to sew, I thought I'd have a crack at sewing him up a personalised name bunting with racing checkers.
It now hangs in his bedroom.
We also had this grand plan of making part of our unused garden space out the back of the house into a mini race track for match box cars.
Although the garden was cleared, a concrete slab went down thanks to hubby and a friend, used car tires were used and a new garden put in around it......it didn't get finished :(
When we got to buying the paint for the concrete and gluing the fake grass down, the nice man at the hardware shop told us we had to wait!
Apparently we would have to let the concrete age at least 8 weeks before we could paint and glue onto
the surface or deal with it all peeling off and be a waist of money.
So we sucked it up and did the best we could and the kids still loved it.
In the coming months we will finish it properly but it's being loved all the same.
The munchkins have fun filling up the backs of the construction trucks with rocks from the garden and exploring the space.
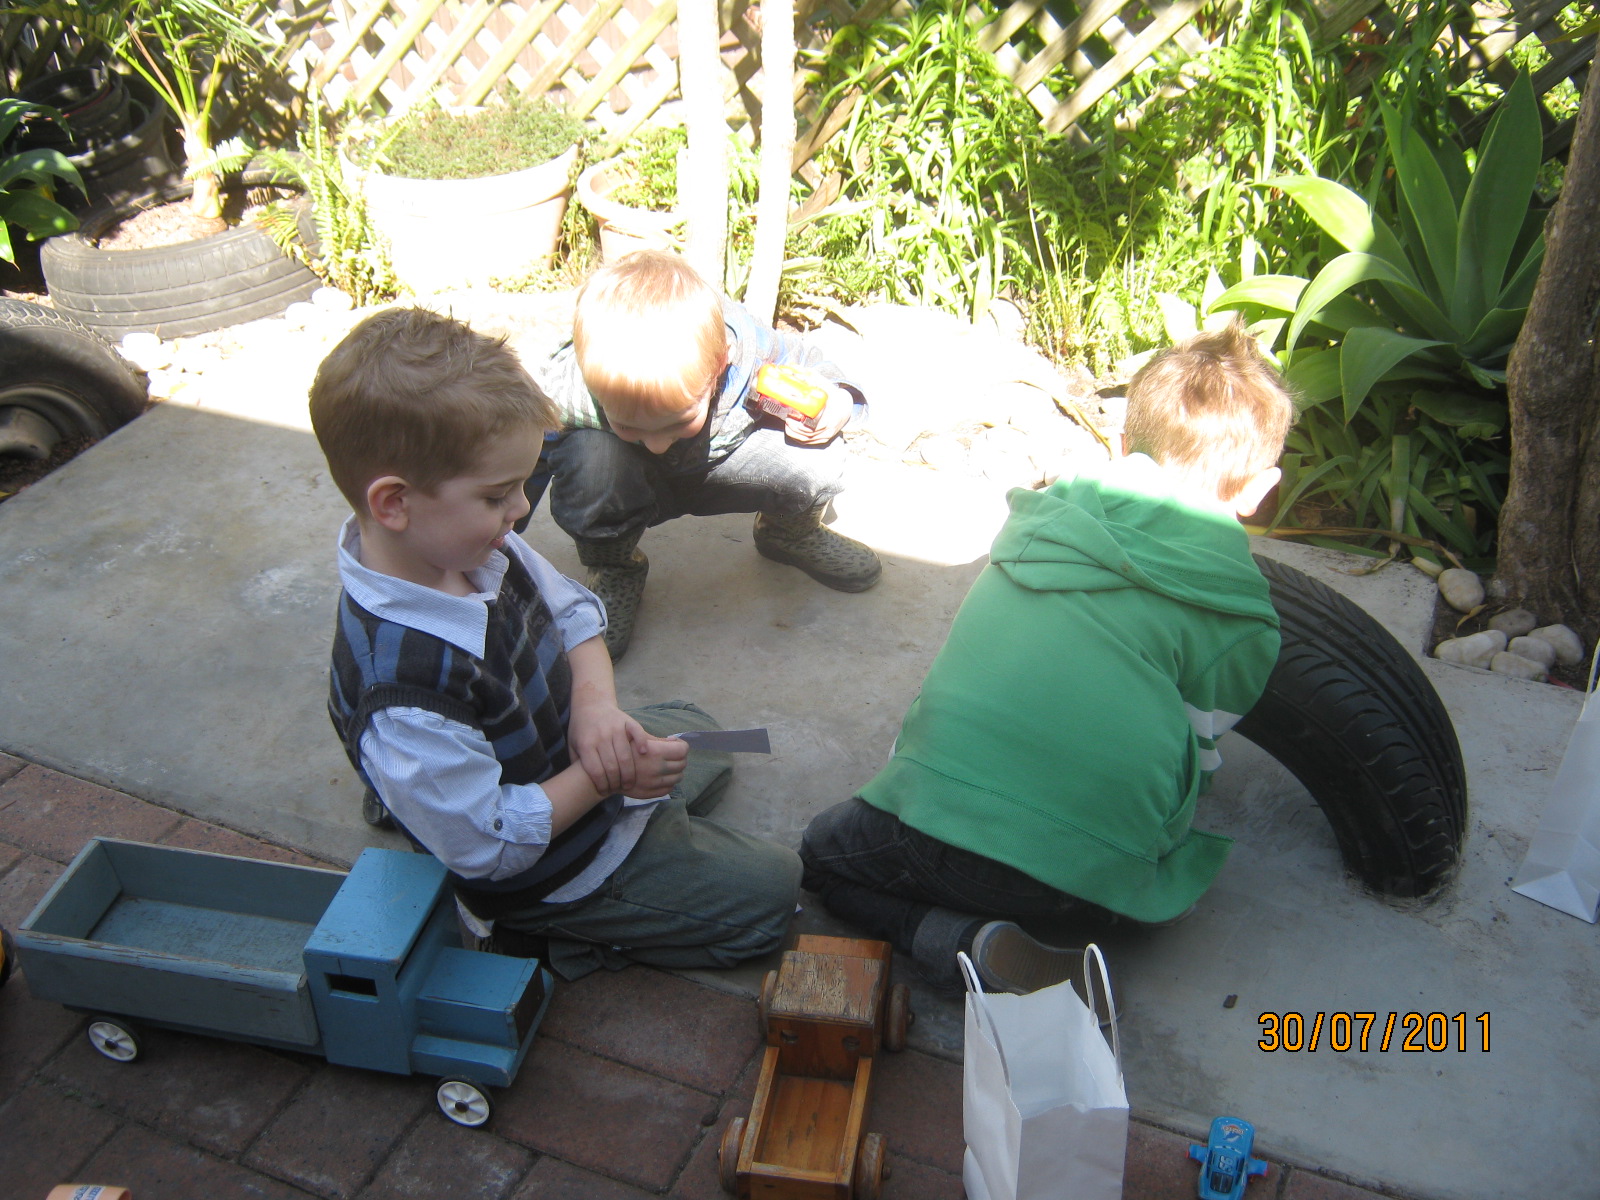
Here are a few pics of the space during the party...
I will do a follow up post when the track is finished :D

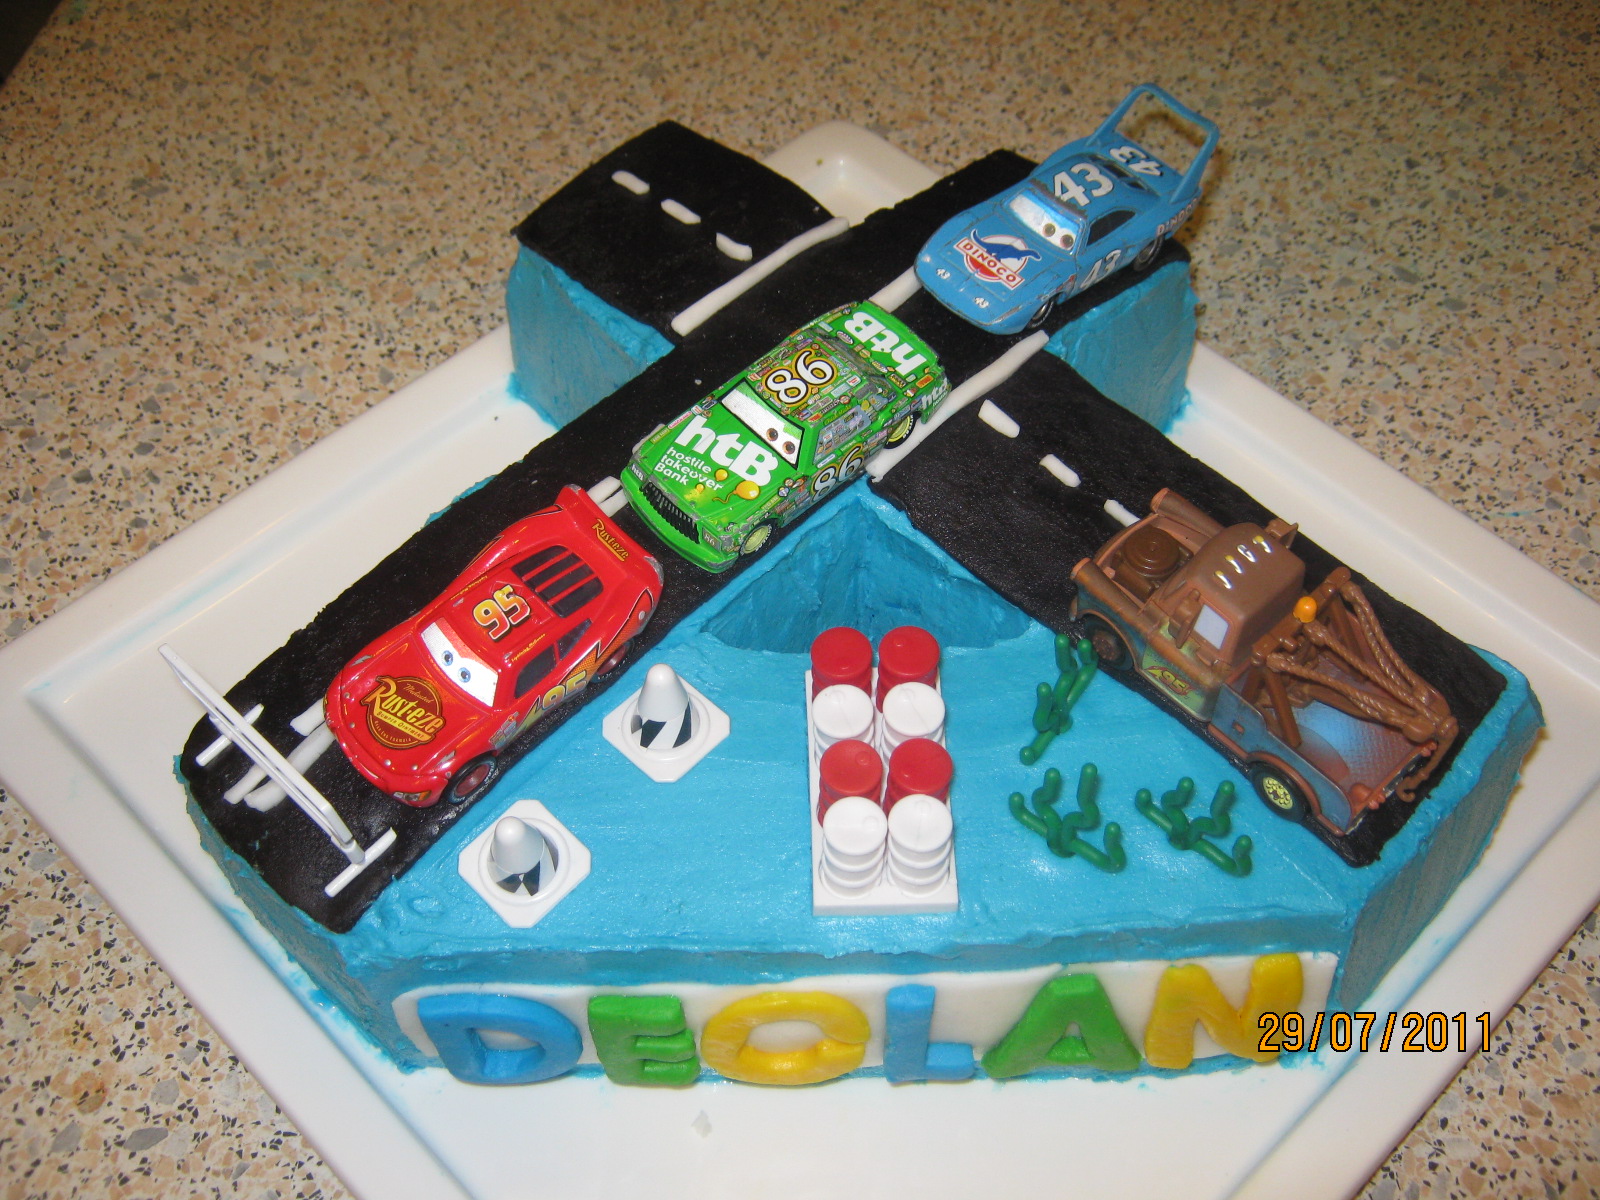
Last of all is the Birthday cake!!! A design with inspiration from the woman's weekly book, then changed, added to and personalised by the birthday boy, hubby and myself.
Due to multiple allergies we made our butter cake dairy, egg and nut free with frosting and marsh mellow icing for the roads and Declan sign.

We cheated a tad by using the toy cars and the plastic road accessories but it was easy and it seemed to work, not to mention Declan's joy when seeing the completed version.

A fun party had by all and as usual enjoyable to plan and create for.


Sunday, August 7, 2011

Peter the Brave Knight with Asthma


This morning we got out of the house for our fortnightly library visit and I couldn't stop smiling when I found a book with not only a Brave night, a dragon, imaginary play but lots of relevant information about asthma..........all subjects that Declan can relate to.
You can take a look at the book here :)

Needless to say with a Knight and Dragon on the front cover, Declan had a smile from ear to ear and immediately wanted to read it.
 After finding it only a few hours ago we have already read it at least three times at the library, put it in our library bag to take home and a very excited boy is waiting to show Daddy when he gets home from work.

Definitely a good book for our family to be reading now that Declan is a little older and becoming more aware about his allergies and asthma. It describes Asthma symptoms and treatments in concept and words that young children can relate to and also makes for a good story.

If you have a little person in your house who wants to tame the wild beast that is Asthma and have more time time chasing Dragons, here is a wonderful book to teach them how to manage and understand their breathing.

So thank you once again to the library, we love you and will continue to visit you often

Monday, August 1, 2011

Vintage Retro cushion

Just thought I'd quickly share with you the cushion I made last night while watching telly :)
I think it's a bit cute and will fit in nicely over in our book nook.

After typing up my last post the sewing bug has hit I felt like creating again and
remembering the utterly gorgeous mother goose fat quarters I brought ages ago made it very tempting indeed.
I tried to combine my love of vintage, retro, spots and stripes to make a lower back cushion all in under an hour. Loving the vintage charm that it brings in the lounge room!

here is a peek
the front

the back


Sunday, July 31, 2011

The sewing bug has hit

I like to dabble in different creative fields will all sorts of media, and where I can I try to incorporate creativity into each day with my children weather it be cooking, craft, painting, dress ups etc

I find handmade things beautiful and full of love and I always think it's lovely when I receive a gift that's thought through and made just for me. I try where I can to make gifts when I have the time for friends and family and I'm always trying to challenge myself with new creative skills and projects.

When it comes to sewing I've been doing it for years but I've only ever been comfortable hand sewing and up until a couple of months ago I had never attempted to use a sewing machine.

Let me try to explain...
 Previous to 2 months ago I would think about using a sewing machine and it would scare me, it sounds silly and it is ...but when it comes to creativity I like to have control, the control of holding the needle in my hand gliding it through the material stitch by stitch, making unique stitches, each one different to the next.

I like the character of a hand stitched item and thinking about a using sewing machine made me think.....the control would be somewhat gone- I would be somewhat board- I would break it!- cause myself some odd type of injury. All of the bad and none of the good thoughts.
It was almost as if the simple object of a sewing machine was some evil form of robot, not that different to a deceptacon from the world of transformers. It was sure to transform into my worst enemy and be the object between my creations and me.

I know it's sounds so spastic beyond belief but I am happy to say that I am cured of this horrible sewing monster robot fear and my creative juices are still flowing.

I have had my Mothers Old perfectly good sewing machine sitting gathering dust for years now and it was time to give it some life again.
My Mother made all her clothes when  she was younger and enjoyed it immensely but she hasn't used it since her late teens when she became a quadriplegic due to a motorcycle accident.

Now that I am a Mother of a little girl I really wanted to learn how to sew her some clothes so the day came when I asked my Father if he could give me a sewing machine lesson...Yep you read it right. My Father is rather domesticated and can use the sewing machine!!!
So with Mother talking Dad and I through the ropes of the sewing machine, me cursing and dad trying to remember how to thread the cotton to prepare the machine, my journey of machine sewing began.

I have to confess I am now hooked and believe that the sewing bug has hit me bad.
I'll let the following pictures tell the tale of my sewing journey so far....

I started practice with cushions
a up cycled men's transformers shirt
and one of Miss Thalia's
owl shirts that no longer fit
(couldn't resist hand stitching around the owl for further detail :P)

next a cushion for each munchkin
material of their choice
Thomas for Declan and Thalia's "Peter Rabbit'

Then Hubby insisted that he needed a cushion for his car too,
he often has a snooze in the car before work if he gets there early enough :P


next came a birthday present
for a gorgeous little 1yr old
nick named "the strawberry princess" since  before birth


a dolly for miss Thalia
named "Maisie"
a dolly babushka for a newborn
baby girl
a birthday pressie
for a Big 4 r old boy
who loves trains and plays soccer
(the small soccor ball and train fit in the babushka's pockets)
He has been named "Bob Bushka"
by his happy owner
another pic of the large fabric soccer ball
in comparison to the real deal

small babushka taggie
for yet another newborn girl

*I then made another large Babushka with babushka baby to fit in her belly pocket but didn't get a picture before giving to a little girl for her 2nd birthday*

next was a Dr Seuss cushion for our lounge room :)
a personalised name pillow and tooth fairy pillow
for a Big 4yr olds Birthday
(Cat in the Hat being one of his faves)

a personalised bunting for Declan's
racing car party
and the last creation was
a babushka girl along with a pillow/babushka bed
for a 3yr old girls Birthday.

now that our busy birthday months have passed I can attempt to tackle some dresses for my little princess....wish me luck cause I'm going to need it! LOL

I sure am glad that I started on the sewing machine and I can't see that I will be stopping anytime soon.

Our Little Book Nook

We love books in this house and have been reading out loud to our munchkins since day dot.
Books have become a very important and treasured part of our daily routines,pleasure and play.

We have books in most rooms in our house including bookcases in both munchkins bedrooms, so it was only natural that I looked in amazement at the beautiful spaces when I stumbled across the blog my little bookcase ideas and be filled with inspiration for our house.

I saw the opportunity to nurture our love of books and create our own special space to read, imagine, play, laugh, cry, relax, learn, listen and retreat into a world of books taking us on journeys of the book kind.

You can go anywhere you want with a book and some imagination and I wanted a space where we could capture this on the cheap.

Two weeks later I have started on our space and it's very much loved already, I tried to work with places and things we already had and let the creative juices flow :)

This is what I have come up with so far....


This is a corner of our lounge room (only carpeted room of our house), to the right of this space is a large L shaped lounge and to the left is our foyer.
The book shelf has always been here but the floor space has mostly been used for a space to store or sit toys. It didn't occur to me to take a before shot :( sorry.

Here is how we changed and added to the space:
  • rearranged mummy and daddy's book so the bottom shelf was cleared for a selection of the munchkins books.
  • Cleared the floor space and moved a large bean bag from another area of the lounge room for a comfy reading seat.
  • Reused a woven basket to hold our library books, keeping the separate from the others and forward facing. These books get changed ever 2 weeks after our most beloved trip to the library.
  • The munchkins helped me select 2 book buddies (Lou Lou the golly wog and Henry the Teddy bear) to sit on a basket along with 2 small baby blankets that are no longer in use now that our munchkins are a tad older. I assume the book buddies with change every now and again so we can read to new toys and share our book space with them.
  • A homemade Dr Seuss cushion was placed in the space for comfort and another way to make the space as book territory, also adding colour and character. More cushions will come in time, I'm thinking some big floor cushions of some kind.
  • A little peoples plastic playhouse has been stored beside the bookcase for an opportunity to incorporate our little people toys into our stories and to play out books (the little people are stored in a nearby toy box)
  • 9 old mix matched photo frames have been saved from the world of dust and cupboards and been revamped with paint we already had. The munchkins helped select images from a few of their favorite books to place on the wall. A trip to Office works and $8.40 later we had some beautiful colour photocopies ready to frame and hang (using picture hooks we had).
So far this is the extent of the transformation but there will be more...I just don't know what yet but will update you at a later date.
An idea's are very much welcome but in the meantime we are loving our new space and I think our book time has improved and extended, less TV being watched (yay) and more imagination and dramatic play on a daily basis :D

Do you have a book space in your house?

Selected images for the wall:
Puff the Magic Dragon, The cat in the Hat, Koala Lou,
Ten Little fingers and Ten Little Toes,
Hairy Maclary and Zachery Quack,
Anamalia, Green eggs and ham,
Each Peach Pear Plum and Blinky Bill.

Miss Thalia enjoying the new space :)

 
Copyright 2009 Sublime Shambles of a Shell. Powered by Blogger
Blogger Templates created by Deluxe Templates
Wordpress by Wpthemesfree